Wednesday, 29 June 2011

Trim and Front Wings on - looking good!

The front wings were a bit of a swine to fit correctly but at least fixing them with the bolts means they won't fly off! The wire for the indicator repeater had to be fed inside the wing stay tube and then into the car. Not easy! I had to feed a sturdy wire that wouldn't bend easily (I used bell wire) up from the little hole in the bottom of the stay tube to appear out of the end by the wing. I could then use masking tape to stick the two wires together and pull back the lot.

Louise did a brilliant job in getting the boot carpet glued in (used spray on contact adhesive) and also the carpets in the footwell sides.

This then allowed us to fit the centre console.
Seats and belts next but we are off to the Goodwood Festival of Speed from tomorrow, so no more progress until next week.

Friday, 24 June 2011

Yes, the rear wings are on!


My daughter, Louise, is my new helper and is playing with time lapse photography!
Wings and lights went on without any problems.
Next are the carpets and trim!

Sunday, 19 June 2011

Looking good!


Roll bar is on, wheels are aligned, and steering centered. Wings next.

Saturday, 18 June 2011

20 MPH. In the garage. With no steering wheel. Awesome!!

We eventually got the car to start fine and it now idles. Trouble is it dies when I apply any throttle! At least the picture proves that the drive train works OK. This is in fifth gear (not the TV programme!).
All the rear suspension is now completed and the roll bar is on.
Brakes and clutch filled and bled. Slight problem with the brake bleeding as I hadn't tightened the joints on one of the 3 way unions so as fast as I was putting fluid in, it was pouring out onto the garage floor! Ho-hum!
As the engine problem is still not sorted I will be leaving the engine bay tidy up, so it is onto fitting the rear wings next.

Monday, 13 June 2011

Three cylinders in my Caterham......

This little piece of the engine is a fuel injector and I need 4 working versions of these for the engine to run cleanly. This one is broken so I only have 3 working cylinders!
Amazingly all of the cooling system pipes and electrical connections were fine and the car started (after a bit of coaxing), but then we couln't get it to idle and realised it was only on 3 cylinders. Went through normal troubleshooting by swapping plugs and plug leads but then saw that the top of the piston on the suspect pot was still nice and shiny aluminium colour which meant it wasn't getting any fuel. Fortunately my able assistant (my nephew) knew a bit about injection systems (I am an old school carburettor guy!) and decided that we could take the system apart and look at the injectors. Bingo! We moved the injector to another cylinder and that went down. We had our culprit! A new one is in the post from Caterham! Good guys!
http://www.youtube.com/watch?v=u3KWM7t3UfM - the not so sweet sound, but loud!

Anyway that gave me a chance to finish off the rear suspension.....
All nice and shiny - for now!
Next stage is getting the engine properly fettled - tidying up wiring looms, pipes etc. and getting the roll bar fitted so I can bolt in the coil srping dampers (just tempoarily fitted currently).

Tuesday, 7 June 2011

Rear suspension taking shape!

I now understand how it all hangs together! The Watts Linkage (the two bars connected to the chassis in the top picture) also connects to the DeDion tube via the bell crank connection. This ensures the tube only moves in the vertical plane and not an arc (a single radius arm option), meaning that the wheel stays in better contact with the road.

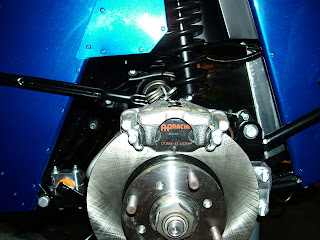
Still need to install the disc and caliper but starting to look better all the time.
Next stage is obviously to get this finished but the most important bit will come up this weekend when I fill the car with all the required fluids, connect up the battery and try a start.

Thursday, 2 June 2011

The diff is in - after a struggle!

 It took us about 4 hours to get the differential located in the chassis whereas Caterham say it should take 45 minutes! Probably next time (there won't be a next time!) will be quicker. The problem was you could get either the top bolts in or the bottom bolts in but not at the same time because the chassis holes were not in sympathy with the differential holes.
In the picture above you will see the metal we had to grind off the top bolt (top middle of picture) to make a point so that we could drift it through the width of the diff (bottom picture).
Anyway this now opens the door for the next stage which is getting all of the rear suspension on.